
How to Draw 3D Letters. Lettering is an integral part of many works of art, and drawing is no exception. What better way to make the letters in your design more creative than adding dimensions?
Also, check our elsa coloring pages for kids.
With 3D letters, anything you write in your design will look ten times more aesthetically pleasing!
Luckily, we’ve created a step-by-step guide to drawing 3D letters, summed up in 9 quick and easy steps.
Also, each guide comes with an illustration, making the process much easier to follow.
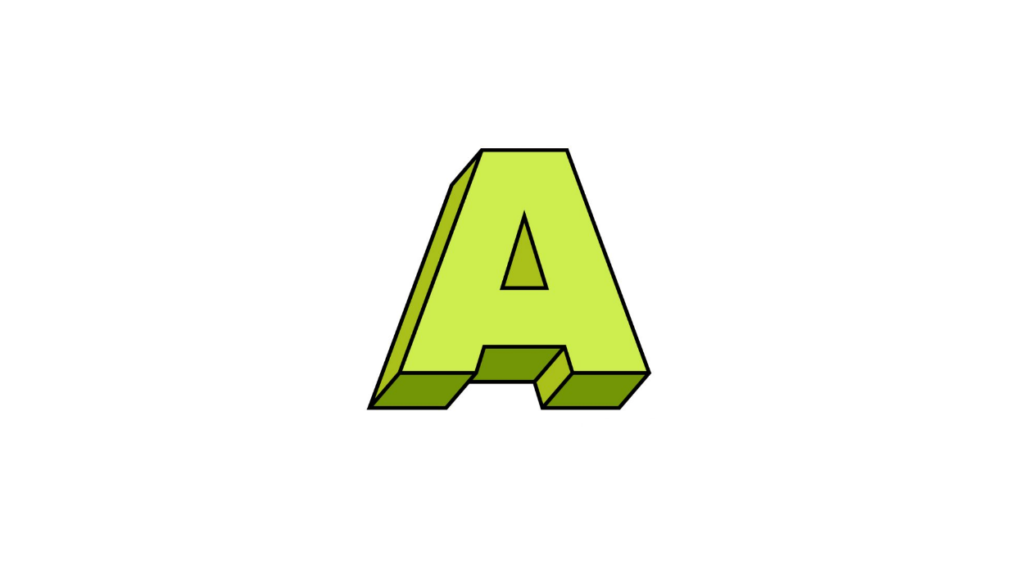
In this tutorial, we will draw a three-dimensional letter A. So prepare a sheet of paper and a pencil and start drawing. Remember to bring your favorite coloring materials too!
How to Draw 3D Letters
Step 1
Start by drawing a triangle shape. This figure outlines the middle of the letter A.
Remember that the triangle shouldn’t be in the middle but slightly to the right of the center. This will ensure there is enough space for the letter size.
Remember that the size of your 3D letter depends on the triangle size. The larger the shape of the triangle, the larger the letter A will be.
The 3D letter mainly consists of straight lines. Therefore, you may need a ruler to draw straight lines quickly and easily.
Step 2
Draw a horizontal line across the triangle we drew earlier. This outlines the top of the letter A.
Remember that there should be a gap between the horizontal line and the triangle shape.
Step 3
Starting at the left end of the horizontal line, draw a diagonally downward line that continues to the left. This forms the border of the letter A on the left.
Step 4
Draw a short horizontal line pointing to the right, starting at the bottom of the diagonal line we drew earlier.
Next, draw a short diagonal line up, sloping slightly to the right.
After completing this step, half of the letter A should be incomplete, as shown in the image above.
Step 5
From the top of the last line drawn, draw a horizontal line. This creates the center line at the bottom of the letter A. This line also connects the two “legs” of the letter A.
Next, draw a downward diagonal line, slanting slightly to the right, starting at the far right of the horizontal line we drew.
Step 6
Draw a horizontal line from the bottom of the earlier diagonal line. This forms the bottom line of the right leg of the letter A.
Remember that this line should be of a similar length to the line on the opposite side that we drew earlier in step four.
Step 7
Complete the shape of the letter A by drawing a diagonal line connecting the two endpoints of the top and bottom horizontal lines.
At this point, the letter A should be fully formed. Do not worry about it! This leaves enough room for the size of the letter A.
Step 8
Now that we’ve finished building the letter A let’s work on the dimensions in this step.
Continue by drawing downward diagonal lines across the top and bottom of the letter.
Remember that all diagonal lines should be slanted to the left, as shown in the image above.
Step 9
Complete the measurements by closing the figures. Continue by drawing a diagonal line that closes the dimensions to the left of the letter A.
Next, draw vertical lines to fill in the gaps at the bottom of the letter.
At this point, the dimensions of the letter A are complete. So your three-dimensional letter A is now complete.
Now that we have successfully drawn a three-dimensional letter A, it’s finally time for the most exciting part. In this final step, we will pick colors and colorize our design. This step is optional, but you should do it to make your artwork colorful.
The colors you use in your design are entirely up to you. Feel free to use any colors you like! You can even use more than one color to make the 3D letter multicolored!
Your 3D Letters Drawing is Finished!